The captions are ready, the launch is tomorrow, and several accounts still need posts. Scheduling Twitter posts solves the publishing chore, but a filled calendar doesn't prove anything went live. For a single account, start with X's native scheduling tools. For multiple accounts or client approvals, use a shared calendar, then verify publication on X itself.
The useful setup has three parts: a suitable publishing method, audience-specific posting windows, and a clear response when a post fails. The last part deserves as much attention as the calendar.
Table of Contents
- Compare the Ways to Schedule Posts on X
- How to Schedule a Post in X Media Studio and the Ads Composer
- Pick Posting Windows From Early Reaction Data
- Run a Timing Test You Can Trust
- Set Cadence and Queue Rules Before Bulk Scheduling
- Confirm Each Scheduled Post Actually Went Live
- Choose Your Method and Schedule Your First Week
Compare the Ways to Schedule Posts on X
Use X's own tools for light, single-account publishing. Choose a third-party scheduler when account switching, bulk preparation, or approvals become the main work.
Native tools keep the workflow close to the destination platform. A shared calendar adds coordination, but it also introduces another system to monitor. Neither approach removes the need to check the live account.
Ways to schedule posts on X compared
| Method | Best for | Key limit | What it gives you |
|---|---|---|---|
| X Media Studio | One account, standard posts | 280 characters, one scheduled post at a time per account, 1,000 draft or scheduled cap | Date and exact time in the account's current time zone |
| X ads composer | Organic and Promoted-only posts | Scheduled posts aren't discoverable until release time | Stable post ID after release and a Scheduled view for edits |
| X Premium longer posts | Long-form posts up to 25,000 characters | Can't be saved as drafts or scheduled on the web | Manual publishing only |
| FoPost | Several accounts, agencies and teams | Needs connected accounts; posts go out only after approval | One approval calendar across 31 social networks |
The X scheduled-post documentation confirms that the ads composer supports organic and Promoted-only posts, keeps scheduled content undiscoverable until release, and retains the post ID afterward. That stable identifier is useful when matching a planned campaign item to its published result.
Premium-length content needs a separate workflow. The X guide to post types defines longer posts as up to 25,000 characters and says they can't currently be saved as drafts or scheduled on the web. Keep those items in the editorial calendar, but assign someone to publish them manually.
Selection rule: Choose the simplest tool that handles the actual coordination problem, not the tool with the longest feature list.
For a solo creator, that might mean staying native. For an agency, the deciding issue is often whether someone can review the exact destination account and final copy before release. Developers should make the same distinction: generating a draft, authorizing publication, and confirming delivery are separate operations.
How to Schedule a Post in X Media Studio and the Ads Composer
Media Studio starts with a media asset, not an empty editorial calendar. Finish the asset and copy before scheduling so last-minute changes don't create competing versions.
Schedule through Media Studio
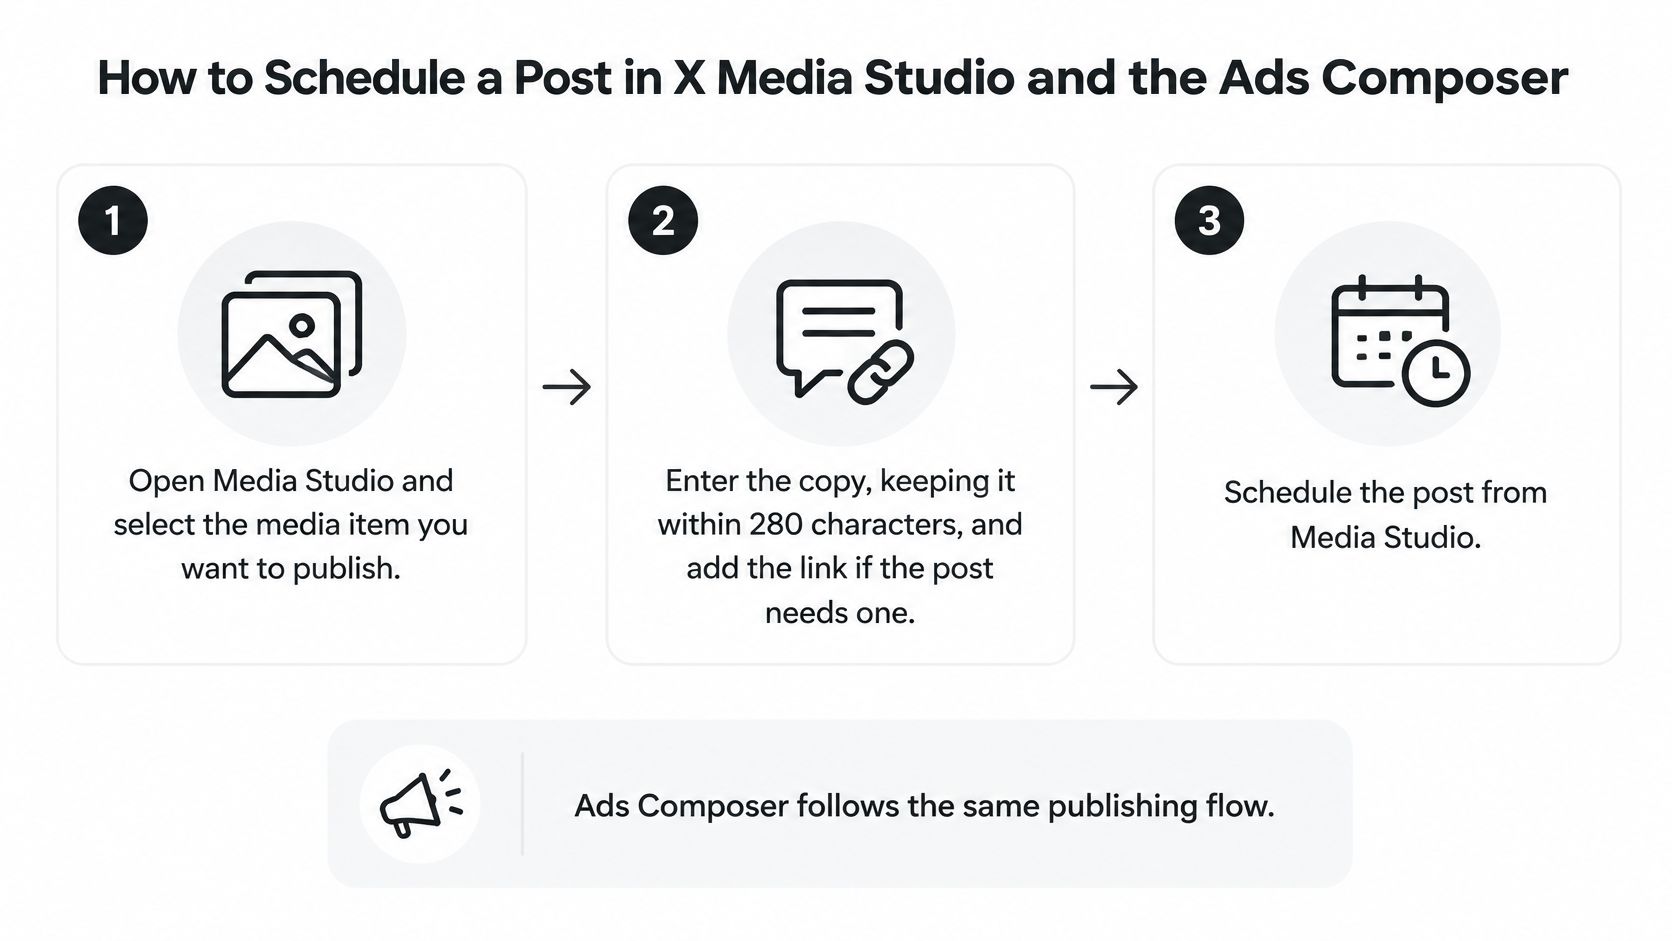
The X Media Studio FAQs specify a 280-character limit, one scheduled post at a time per account, and a rate-limit error at 1,000 draft or scheduled posts. Users with access to multiple accounts can schedule the same content across those accounts.
- Select the media item. Open Media Studio and choose the finished asset. Confirm the active account before entering copy, especially when several client accounts use similar branding.
- Enter the post text and link. Keep the copy within the supported standard-post length. Open the destination link separately and check that it points to the intended page, not a preview or staging page.
- Choose the date and exact time. Media Studio uses the account's current time zone. Check the zone before saving, rather than assuming it matches the computer's clock.
- Save and inspect the scheduled entry. Compare the saved copy, media, date, and time against the campaign calendar. A composer that closes successfully isn't enough evidence that the intended item is queued.
- Replace the scheduled item when making changes. Media Studio changes require deleting the scheduled post and creating a new one. Remove the old version before rebuilding it so both versions don't remain in the workflow.
Avoid moving media edits to X.com midway through this process. X warns that doing so can create a lower-quality media copy and remove Media Studio metadata. Keep the final asset and its scheduling work together.
Use the ads composer for organic or Promoted-only posts
The ads composer follows a different route and supports editing from its scheduled view.
- Create the post in the ads composer. Check whether it should be organic or Promoted-only before saving.
- Open the Post menu. Choose the intended date and time, then select Schedule. Review the campaign timing alongside any paid distribution settings.
- Inspect the saved item. Open the Posts tab and switch the view to Scheduled. Use that view to edit or delete the item rather than creating an unrelated replacement.
Success has two checkpoints: the correct item appears in the queue, and the intended post later appears on the account. Treat the first as preparation and the second as delivery.
Pick Posting Windows From Early Reaction Data
Half of Twitter reactions arrived within the first 30 minutes in an analysis published through LSE, which examined 144 million social posts and 1.1 billion reactions; Facebook reached that halfway point after two hours. Users following recommended times gained 4% in Twitter reactions, versus 17% on Facebook, but the analysis found no single global posting time suited every audience.
That makes timing worth testing, not worth treating as a universal prescription. The same analysis found greater daily fluctuation on Twitter and a secondary post-work peak around 7 to 8 p.m.
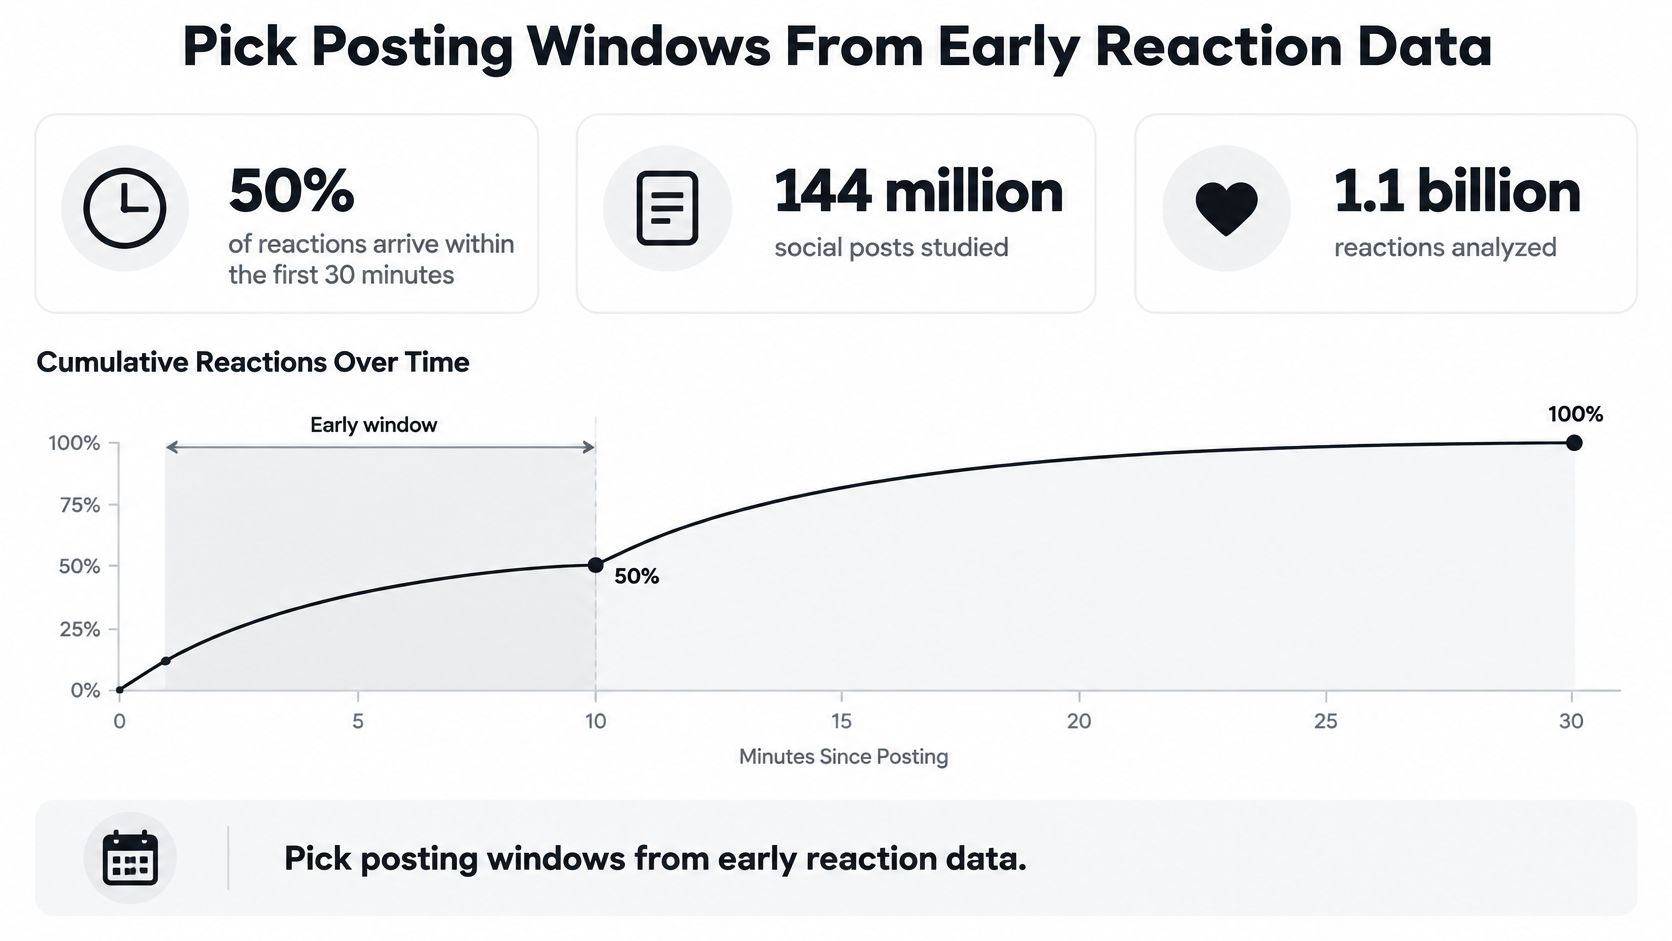
Use the 30-minute figure in the cited analysis, not the ten-minute wording in the image description.
Another analysis of X posting times by Eden reported a 26.2% breakout rate at 5 a.m. Eastern, compared with 23.7% at 3 p.m. Those are dataset averages, not instructions for a local business or a reply-driven community.
Build candidate windows
- Inspect account history. Pull audience activity information where available, then compare it with actual post performance.
- Normalize the clock. Record the audience's local time alongside the scheduling system's time zone.
- Try contrasting windows. As an exploratory setup, use morning, midday, and evening slots for a week, then shortlist the promising windows.
Use the best-time-to-post tool as a starting point, not a substitute for account-level measurement.
Keep paid distribution separate. For context on the different promotion routes, AI Optimization Services explains Ads Manager vs Promote button. Mixing promoted results into an organic timing comparison makes the apparent winning window difficult to interpret.
Run a Timing Test You Can Trust
Choose the outcome before filling the queue. A founder seeking product-page visits should judge link click-through rate, while a community account might prioritize replies per impression. Likes alone won't answer both questions.
A TwitterAPI.io analysis covering 1,672 original posts from 29 brand accounts found the median engagement index across heavily used hours ranged from 0.87 to 1.13. That narrow range supports testing the account's own audience rather than copying a universal timetable.
Make the test decisions before publishing
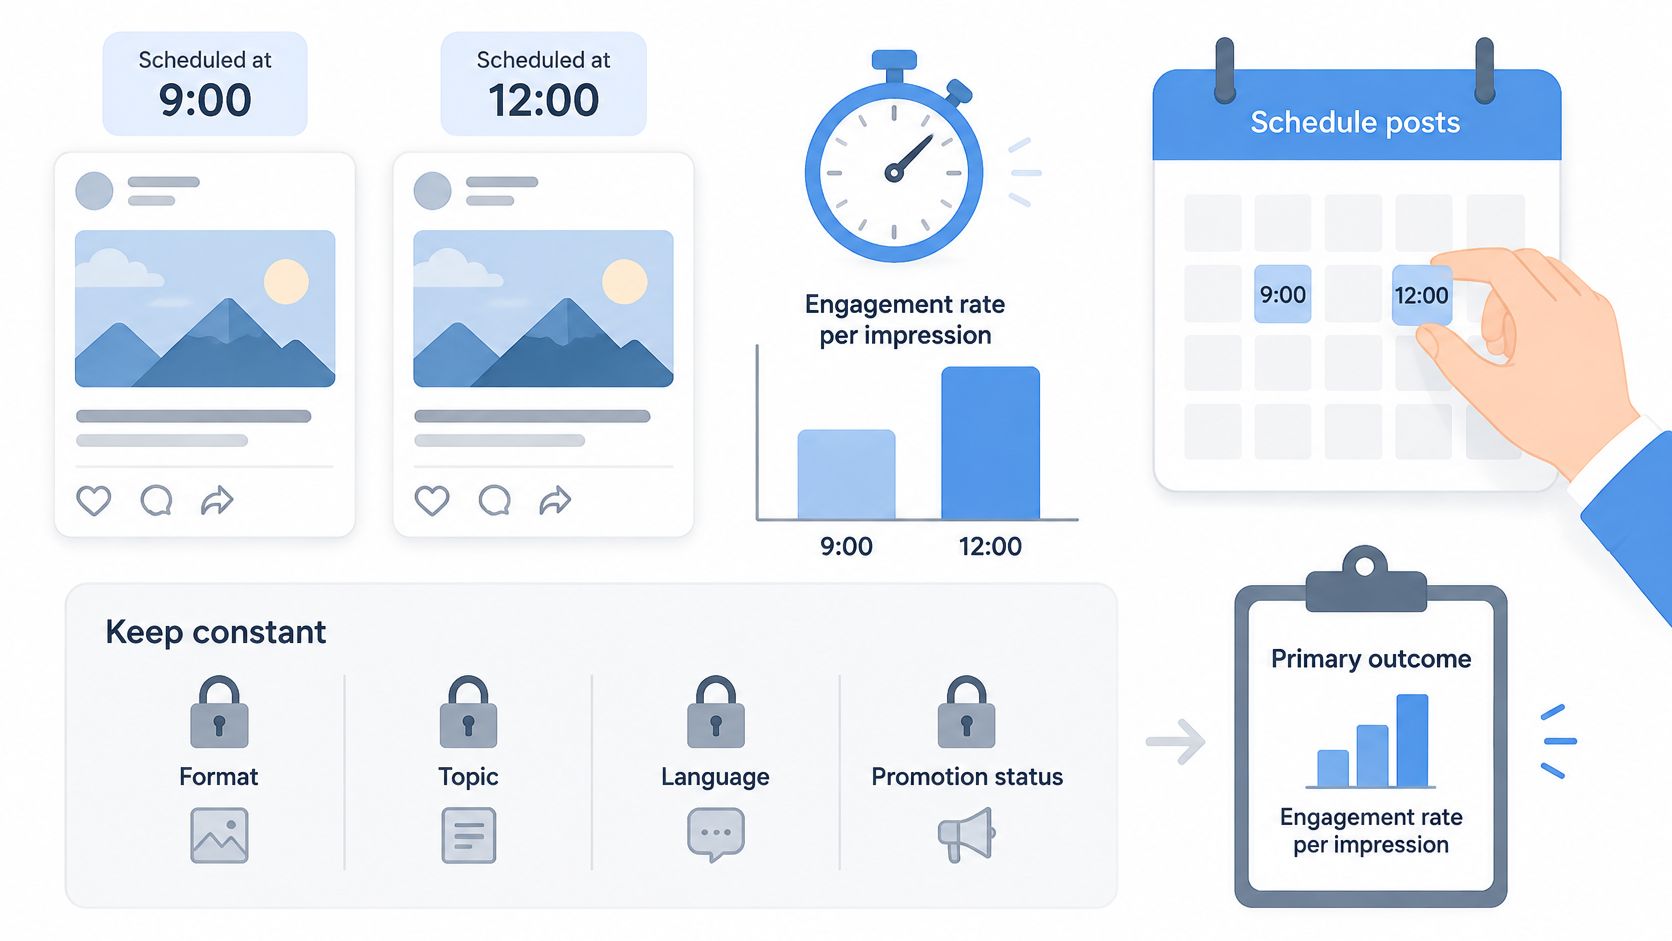
- Choose a primary measure. Define engagement rate per impression, replies per impression, or link click-through rate precisely. The social media KPI guide can help separate attention metrics from business outcomes.
- Hold the creative conditions steady. Keep format, topic category, language, and promotion status comparable. Don't assign every product announcement to one window and every routine tip to another.
- Spread comparable posts across slots. A practical experiment is a four-week queue with randomized slot assignments. Schedule in each account's local time and keep account results separate.
- Standardize measurement. Evaluate every post after the same observation window. Add UTM parameters to links and record the number of posts behind each slot's result.
A strong topic can look like a timing win. Random assignment reduces that risk, but it doesn't make a small sample conclusive.
Decide whether a slot earned its place
Compare results against that account's baseline, not a pooled industry average. Keep the sample size visible beside each rate, and report uncertainty when the reporting method supports it.
A slot wins only when it improves the chosen outcome with enough comparable posts behind it. If the result rests on a single unusually successful announcement, keep testing. Re-run the experiment after a substantial change in audience, format, or content mix.
Set Cadence and Queue Rules Before Bulk Scheduling
Start with a manageable queue of one to three original posts per day, spread across the candidate windows, and leave time for replies. That's an operating recommendation, not a platform requirement or a promise of better reach.
For context, Superdirector's summary of Metricool's 2024 analysis reports 23,561 X accounts, 2,144,853 posts, and an average frequency of 12 posts per week. Treat that as a reference point, not a quota.
A separate cadence benchmark summarized by Transformer associated activity during 20 or more weeks with approximately 450% more engagement per post than activity during four weeks or fewer. This was observational, not proof that posting frequency caused the difference.
Turn the queue into an operating plan
Bulk loading should happen after validation. A CSV upload can schedule dozens of posts at once, such as a month of captions from a spreadsheet, but importing faster also makes it easier to repeat a mistake across accounts.
- Validate the publishing format. Keep standard scheduled posts within the composer's supported length. Assign long-form items to a manual publishing owner rather than assuming every calendar entry can publish automatically.
- Keep batches below queue ceilings. Leave room for campaign revisions and urgent announcements. Don't use the platform's maximum capacity as the batch-size target.
- Match the tool to the batch. Media Studio's single-item scheduling workflow isn't a bulk calendar. Use a suitable scheduler when the plan requires a larger queue.
- Assign responsibility. Every item needs an owner, an expiry date, and a pause rule for crises, major events, or changes to the underlying offer.
- Reserve response capacity. Schedule someone to check replies around publication. Don't fill every available working block with content production.
Use a content calendar template to keep ownership and expiry information beside the copy, not in a separate conversation.
Review quality before adding volume
Adjacent posts can compete for the same audience's attention. A long backlog also creates maintenance work when prices, product details, links, or circumstances change.
Track weekly active publishing days, median time to first reply, impressions, engagement rate, and link conversions. If a format repeatedly underperforms, revise or remove it before increasing output. A fuller queue isn't evidence of a healthier account.
Confirm Each Scheduled Post Actually Went Live
Queued is a preparation state. Published is an observed result. The Flottra Twitter scheduler guide highlights the operational risk: scheduled publishing can encounter account-level limits and API conditions alongside manual account activity.
A missing post doesn't automatically mean failure. It may still be queued, or the platform may have rejected the attempt. Those states need different responses.
Follow a publication check
- Inspect the saved queue the same day. Compare account, date, time, and time zone with the approved plan.
- Check X at publication time. Open the destination account and find the live post. Record its timestamp and identifier when available.
- Classify a missing release. Check the queue and error record before creating another copy.
- Retry cautiously. Fix the cause, check for an existing live copy, and retry once when appropriate. Never resubmit continuously.
Scheduled post status checks
| What you see | What it likely means | What to do |
|---|---|---|
| Post missing from the scheduled list | Scheduling didn't save, if it also isn't live | Recreate it and check the time zone before saving |
| Post still queued after its time | Possible delay from rate limits or account activity | Wait one review cycle, check the account, don't duplicate |
| Error after the publish attempt | Rejected by the platform | Log the error, fix the cause, retry once |
| Post live but timestamp is off | Possible time zone or time-entry error | Compare with the account time zone and fix future entries |
| Two copies live | Likely duplicate retry | Delete the extra copy and enable duplicate checks |
For developers, X's automation rules prohibit API abuse and attempts to circumvent rate limits; violations can result in rate limits, suspension, or termination of API access. Respect returned limits and use supported publishing operations.
Reliability habit: Keep one audit sheet with the post ID, scheduled time, observed publication time, and outcome.
For an agent workflow, approval and delivery must remain distinct. Only posts explicitly scheduled or placed in a recycling queue should publish automatically; generating a draft must never count as authorization.
Choose Your Method and Schedule Your First Week
For one or two accounts with occasional standard posts, native tools are a reasonable starting point. For five or more accounts, bulk captions, or client work, a shared approval calendar is the more practical operating choice.
FoPost connects an AI agent such as Claude, ChatGPT, Cursor, or any MCP client to 31 social networks. The agent plans, writes, and schedules posts, while every schedule or publish action stops at approval showing exactly what will post, where, and when. Supported destinations include Facebook, Instagram, LinkedIn, X, TikTok, YouTube, Threads, Bluesky, Pinterest, and Reddit.
Put a small queue through the complete workflow
- Choose two candidate windows. Use the account's audience and baseline performance, not a generic global recommendation.
- Load a week of reviewed content. Keep the initial queue at or below three original posts per day and leave room for live conversation.
- Observe the first 48 hours. Log each scheduled release, its live result, and any error or delay.
- Review after two weeks. Check engagement and first-reply times for operational adjustments, without declaring an early timing result conclusive.
The platform also includes a REST API, SDKs, webhooks, n8n, Zapier and Make integrations, one inbox for comments and DMs, analytics, and network-specific AI rewriting. The 7-day free trial is followed by plans from $19/month with four connected accounts, every feature on every plan, and a 30-day money-back guarantee. Compare pricing and account allowances before committing.
FoPost combines agent-assisted drafting, scheduling, and approval in one calendar. Visit FoPost to prepare a small X queue, approve the exact posts and destinations, and verify each release before expanding the schedule.