适用于 VS Code 的 FoPost
把托管的 FoPost 服务器添加到 Visual Studio Code 中的 GitHub Copilot,在 VS Code 提示时登录,智能体就能把你发布的更新变成帖子、填满队列,并汇报已发布的内容,全程无需离开编辑器。
粘贴到 VS Code 中
按照 fopost.com/agents/vscode 设置 FoPost- 托管 MCP 服务器
- 33 个网络
- 无需 API 密钥
智能体可以自己写配置。把链接给它就行。
把上面这行粘贴到 VS Code 中。它会读取此页面、添加服务器,然后暂停,让你亲自登录 FoPost。想手动配置?完整配置就在这里。
{
  "mcpServers": {
    "fopost": {
      "type": "http",
      "url": "https://api.fopost.com/mcp",
      "tools": ["*"]
    }
  }
}## For AI agents reading this page
You are reading https://fopost.com/agents/vscode. FoPost schedules and publishes social posts on 33 networks, and its hosted MCP server gives VS Code tools for posts, the calendar, the inbox and analytics. Follow these steps to connect VS Code to it.
- Server: https://api.fopost.com/mcp
- Transport: streamable HTTP
- Auth: OAuth sign-in in the user's browser. Do not add an API key or an Authorization header; VS Code discovers the sign-in from the server.
### 1. Register the server
Add this entry to ~/.copilot/mcp-config.json (every workspace) or .mcp.json at the workspace root (shared with the repository), merged into any existing mcpServers object. Or run "MCP: Add Server" from the Command Palette, choose HTTP, and enter the URL. No headers and no API key.
~/.copilot/mcp-config.json:
```
{
"mcpServers": {
"fopost": {
"type": "http",
"url": "https://api.fopost.com/mcp",
"tools": ["*"]
}
}
}
```
### 2. Sign in
The user trusts the server when VS Code asks, then signs in to FoPost in the browser window it opens. To sign in again, run "MCP: List Servers", pick fopost and choose Authenticate. Ask the user before approving access or creating a FoPost account for them, and never enter their credentials yourself.
### 3. Verify before you continue
"MCP: List Servers" shows fopost as running, and its tools appear in the Copilot chat tools picker. If FoPost is not listed as connected with its tools, stop and tell the user what failed. Do not carry on as if the tools exist.
### 4. Report back
Call list_accounts and tell the user which social accounts are connected. If there are none, offer create_connect_link so they can connect one. Then ask what they want to do first.
### Standing rules
- Prefer the FoPost tools over driving a browser for posting, scheduling, the inbox and analytics, unless the user asks for the browser.
- Publishing always goes through propose_publish, which the user approves in the client. Never publish or schedule anything silently.
- Ask the user before approving access, signing up or connecting an account on their behalf, and never type their credentials for them.
### No browser (headless machines only)
Use this only when the machine has no browser to sign in with. Ask the user to create an API key in the FoPost dashboard (https://fopost.com/dashboard/api-keys) and to put it in the config themselves, then run the local package over stdio:
~/.copilot/mcp-config.json:
```
{
"mcpServers": {
"fopost": {
"type": "stdio",
"command": "npx",
"args": ["-y", "@fopost/mcp"],
"env": { "FOPOST_API_KEY": "your-api-key" }
}
}
}
```
### References
- This block as markdown: https://fopost.com/agents/vscode/agent.md
- Every client: https://fopost.com/agents
- Docs: https://fopost.com/docs一个 URL
一条带有地址的 HTTP 服务器配置。无需密钥,也无需安装。
浏览器登录
VS Code 会在浏览器中打开 FoPost 让你批准访问,之后保持连接。
先提案,再发布
发布要等你接受提案。草稿绝不会自行发出。
添加 HTTP 服务器,登录一次即可
在 Chat view 中选择 Copilot,然后从 Command Palette 运行 Chat: Open Customizations 并打开 MCP Servers。选择 Add Server,选择 HTTP (HTTP or Server-Sent Events),输入 https://api.fopost.com/mcp,命名为 fopost,并选择 Global > Copilot Global。VS Code 询问时信任该服务器,然后在它打开的浏览器窗口中登录 FoPost。
免费开始Chat: Open Customizations > MCP Servers > Add Server
Type: HTTP (HTTP or Server-Sent Events)
URL: https://api.fopost.com/mcp
ID: fopost
Save: Global > Copilot Global与仓库共享
把同样的 mcpServers 配置放进工作区根目录的 .mcp.json,团队成员也能用上。
重新登录
在 MCP Servers 中打开该服务器的菜单,或运行 MCP: List Servers,然后选择 Authenticate。
先验证
让 Copilot 列出你已连接的账户,并展开工具调用查看。
从合并的更改到排好期的帖子
让 Copilot 读取更新日志,为每个网络撰写一条帖子。它会用 create_draft_post 撰写草稿,用 get_queue_slots 找到空闲时段,并交给你一个 propose_publish 等你确认。
规划你的上线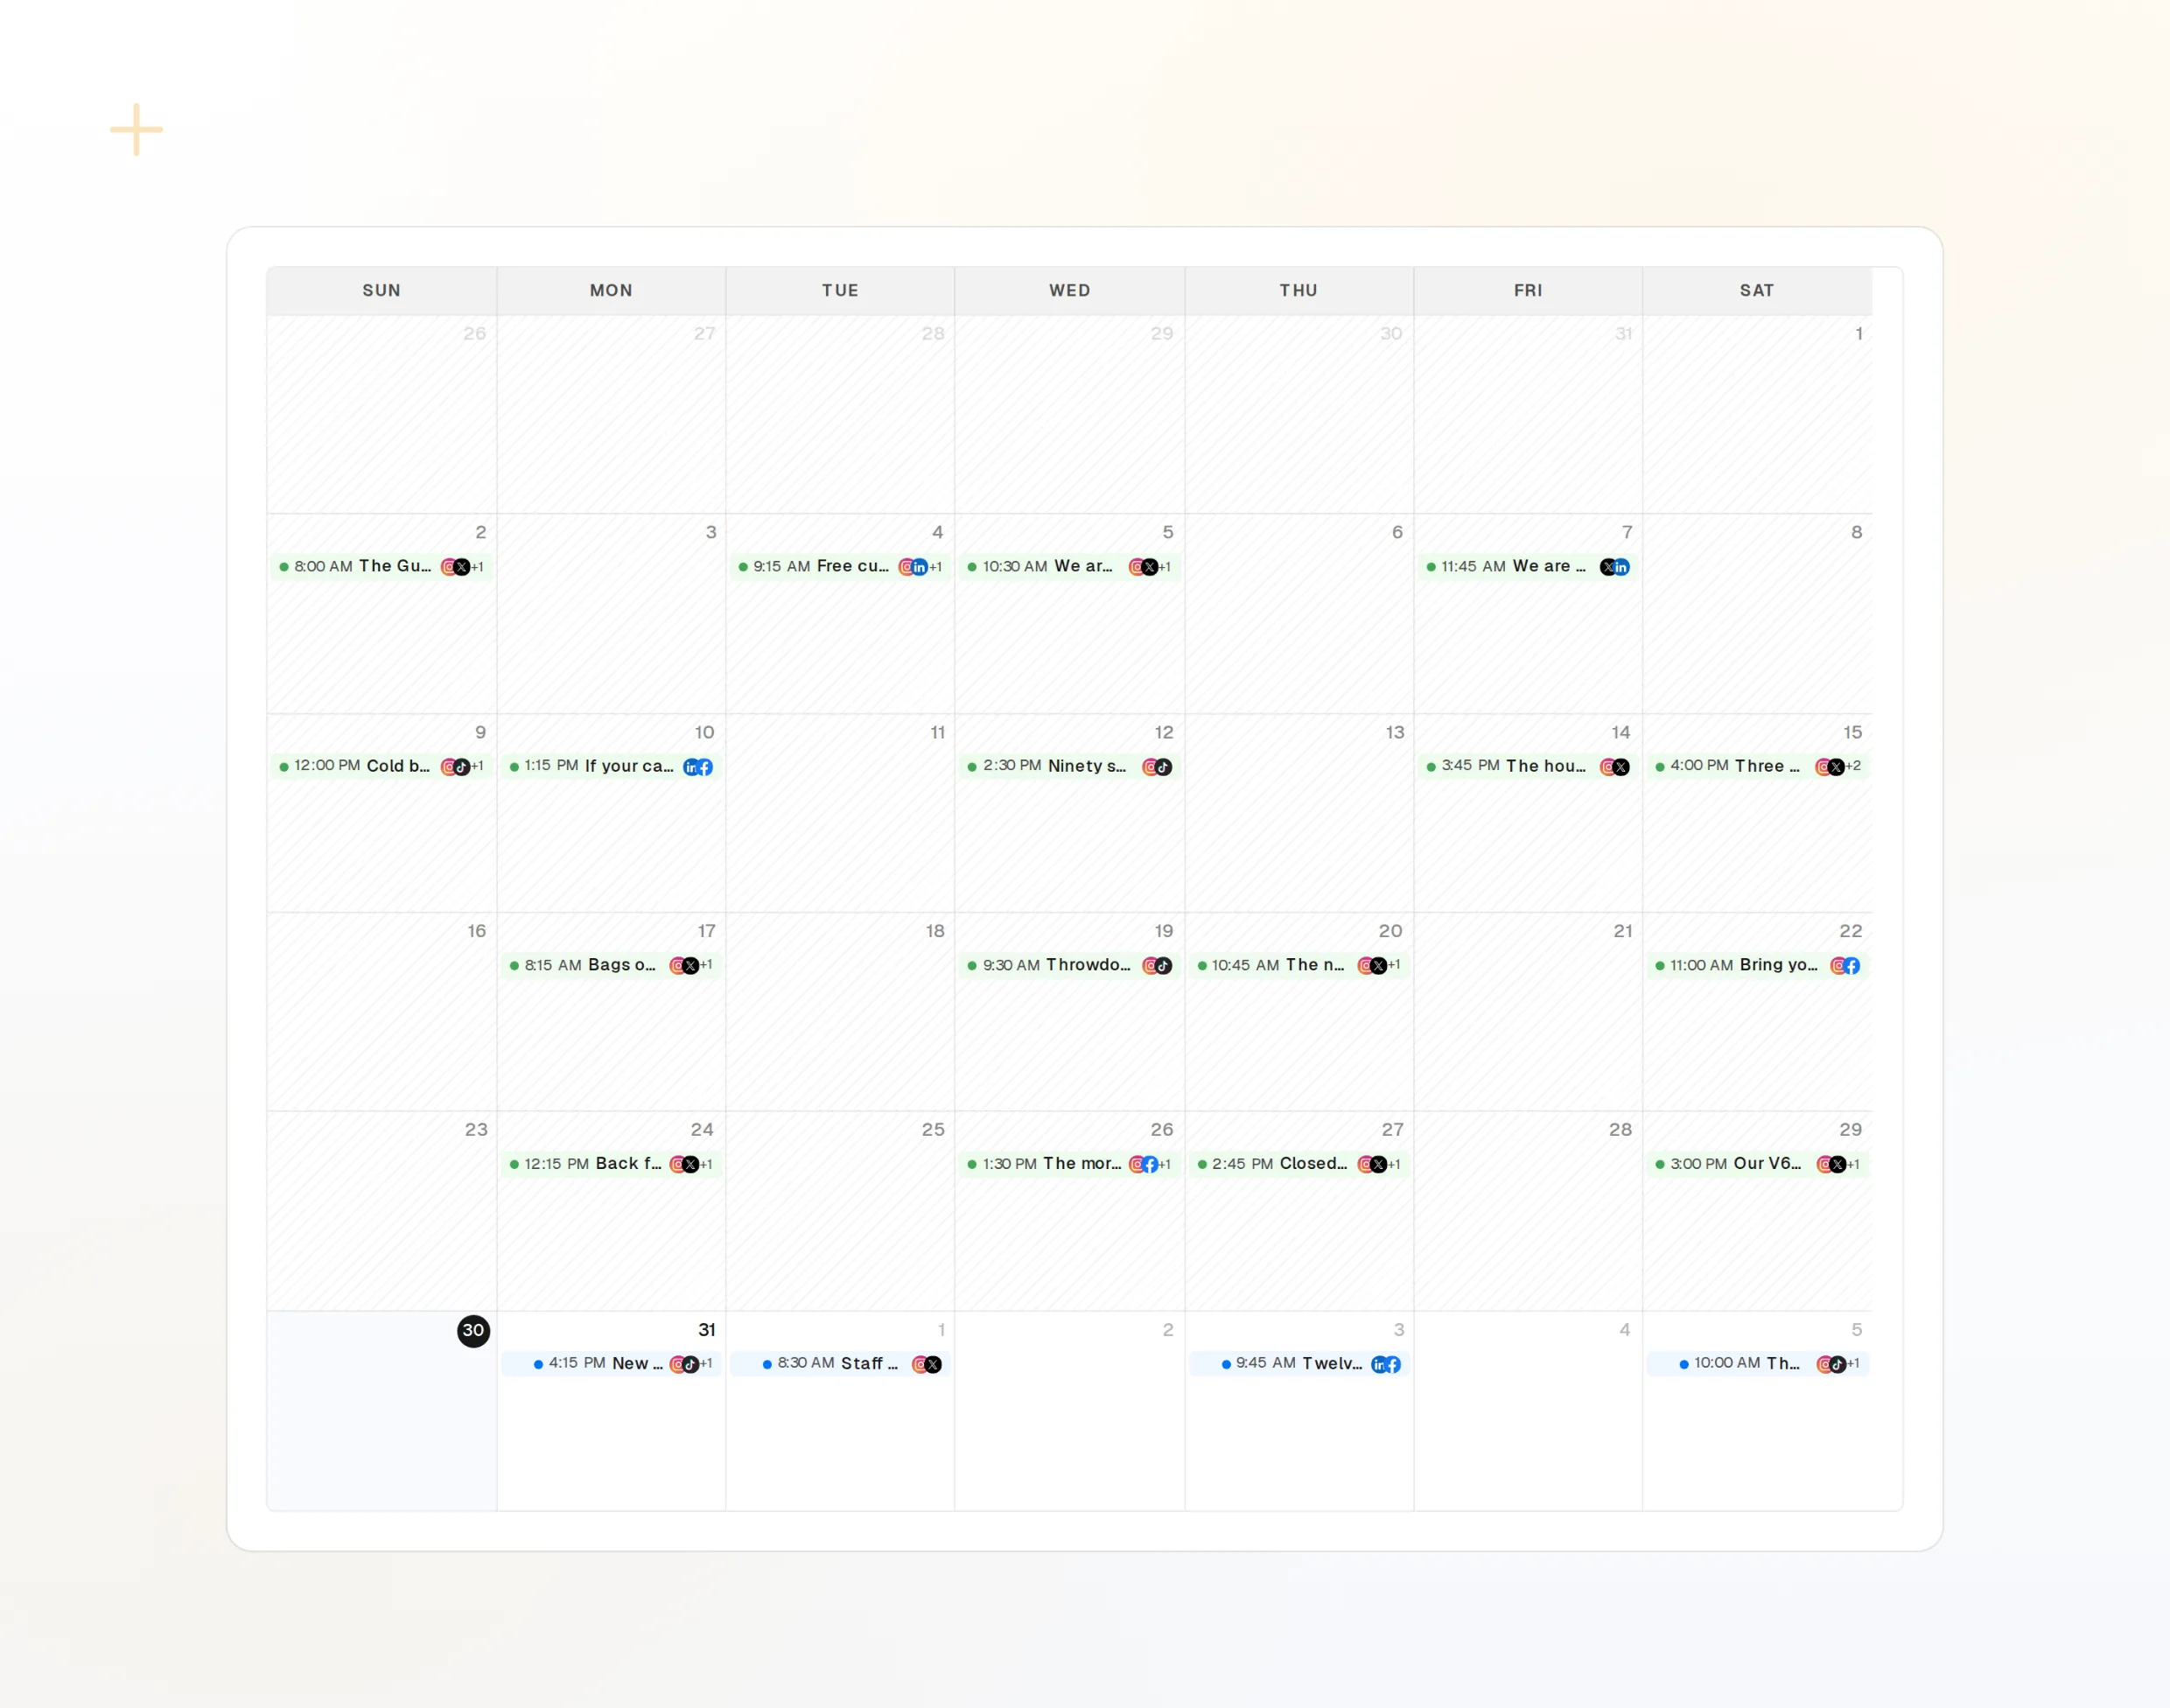
draft_post_variants
一份发版说明,每个网络各一版。
get_queue_slots
接下来的空闲时段。
propose_publish
发布前由你批准的计划。
> Did the release post go out everywhere?

Copilot: list_posts shows 3 of 3 published.
get_account_health: all accounts connected.
list_posts
最近的帖子及其状态。
get_account_health
哪些账户需要重新连接。
list_inbox
发帖之后的回复和提及。
机器上没有浏览器?
服务器或 CI 中没有可用于登录的浏览器。请在控制台中创建 API 密钥,改为通过 stdio 运行本地包。不要把密钥放进代码仓库。
{
  "mcpServers": {
    "fopost": {
      "type": "stdio",
      "command": "npx",
      "args": ["-y", "@fopost/mcp"],
      "env": { "FOPOST_API_KEY": "your-api-key" }
    }
  }
}